
How to make a 3D standing Lorax cake tutorial
So, I’m no expert, I mostly make things up as I go along, but here’s how I made my lorax cake… I hope it helps someone and maybe give you the confidence to have a go at a standing cake if you haven’t yet, as this was my first.
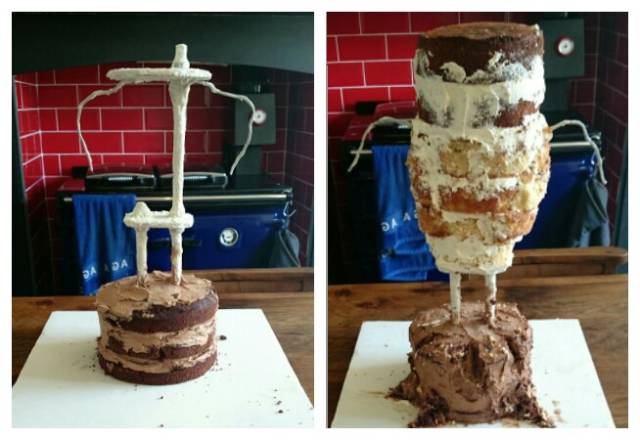
I used steel rods bolted into an mdf board to create a strong internal structure. Two mdf boards were cut and bolted in to give me a platform to build the cake upon. I blew up a picture of the lorax to the exact size that I wanted to recreate and used this as my template to decide how big the cake boards should be and exactly where they should be placed.
I used a hot glue gun to attach supports for the arms. I then covered the entire support in chocolate to make it food safe.
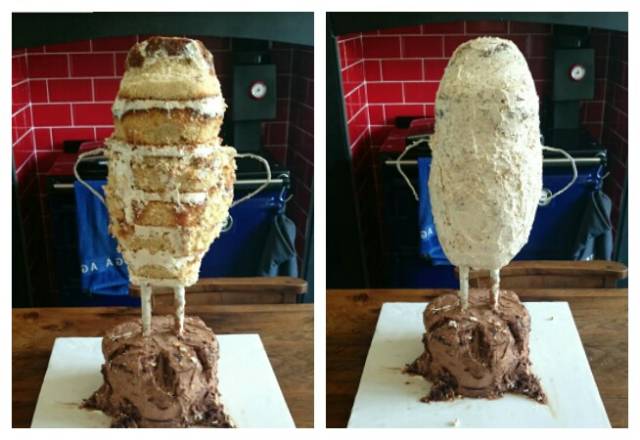
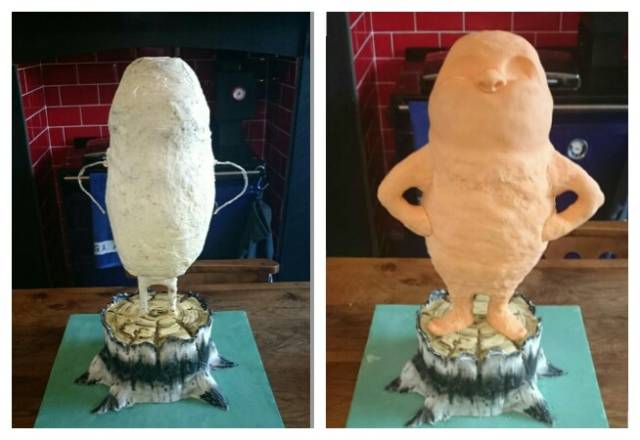
After filling and stacking the cakes, I then carved the shape of the tree stump and the lorax using my template as a reference guide. I then crumb coated both cakes and refrigerated for 20 mins until the buttercream had set.
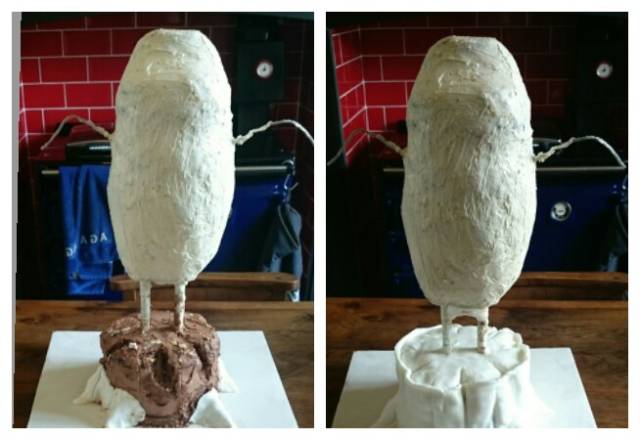
I added another layer of buttercream, this time using it to add shape and features. I also added fondant to the tree stump for the roots. I intended to airbrush and paint the tree stump so I used white fondant to cover the tree stump.
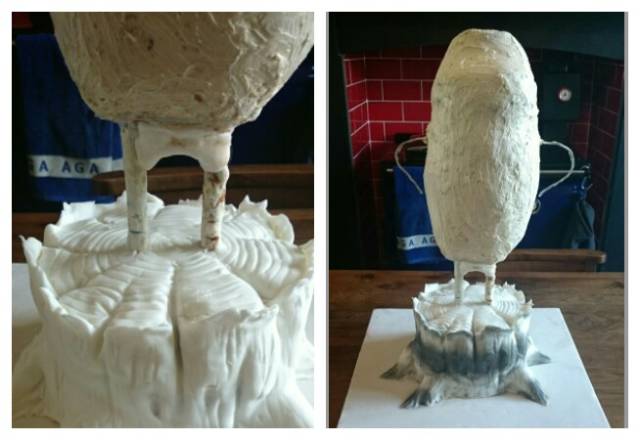
I used the back of a paintbrush to add details to the tree stump, then I used black airbrush paint to create the impression of a truffala tree pattern on the tree stump.
I used black food gel to paint more details onto the tree stump, and various shades of brown for the tree stump rings. I painted the board green.
I then built up the legs, feet and arms using modelling chocolate, then covered the entire lorax in orange fondant.

I used a 50/50 mix of fondant and flower paste and coloured it yellow to create the moustache and eyebrows. I’m a bit of a ‘make it up as you go along’ baker so I had no idea how to add the moustache! I used royal icing to stick it on and then used paper towels to hold it up while it dried. However… I’m very impatient and messed around with it too much which as you’ll see soon resulted in a near disaster!!
I use flower paste to made the eyes, and painted the details on, using my picture template as a reference.
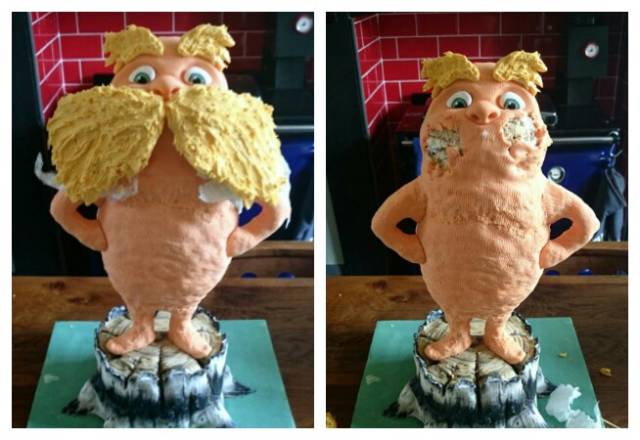
In order to add texture to the moustache, I melted chocolate and coloured it yellow. I then brushed it onto the moustache. Although I liked the effect, it made the moustache too heavy and I stared to see cracks under the eyes as it pulled away from the face…. AGGGHHHHH!! major panic!!! I decided to just removed the moustache and start again before the whole thing fell apart! I could’ve done with a large glass of wine at this point!
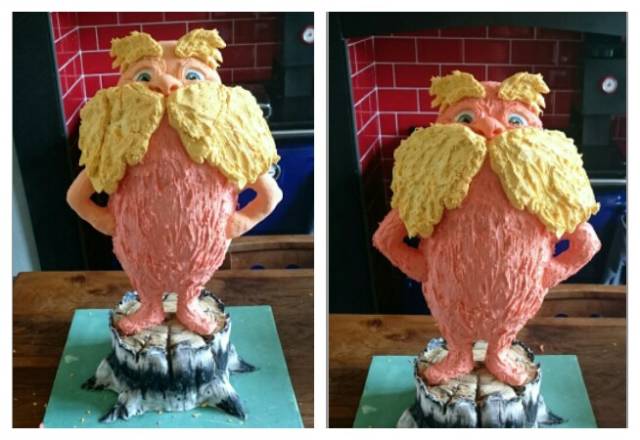
I took a deep breath and decided that I would have to sacrifice some of the ‘poufiness’ of the moustache… it was better for it to be a bit flatter than to not have one at all!! I used chocolate to attach the moustache back onto the face – this is a much stronger ‘glue’. I then decided that I wanted the lorax to be more orange and to have a more fur like texture, so I used coloured white chocolate and painted it across his whole body, using a modelling tool to add texture as I went.
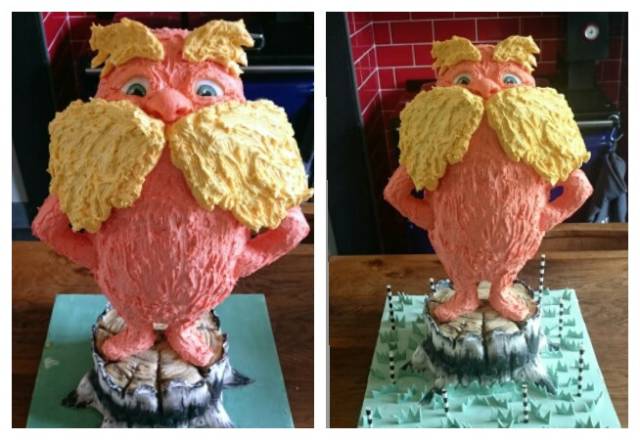
I then added bits of green fondant to the board for grass, and used black and white striped paper straws for truffala trees.
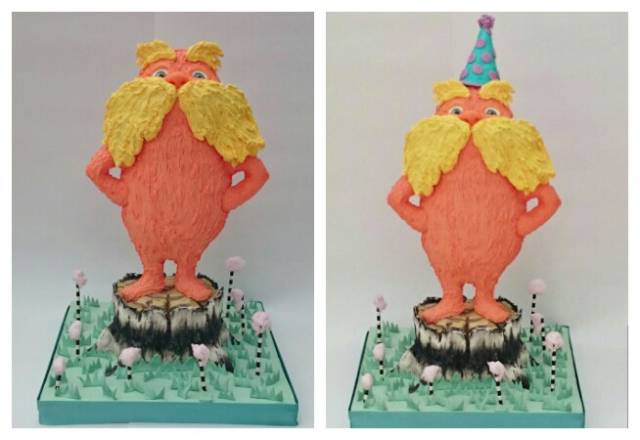
I added pink candyfloss to the truffala trees, and then decided that it would be fun to give the lorax a little party hat! I mad this out of fondant, left to dry around a paper cone. And ta-da… he was ready for the party!!
If you have any questions on tools, or any techniques, please feel free to ask me, I’m more than happy to help. Happy Caking!!
Fiona x
Thesugarcloudcakery
24 Comments

Great Tute :) x
Vanessa-Mmmm cakes and cupcakes
Fantastic, thanks so much
You must never limit your challenges, instead you must challenge your limits
Your more than welcome ladies :-) x
Thesugarcloudcakery

Just looked at this one Fiona, brilliant job! Its amazing to see your progress pics and hear the story of how it all came together. I was almost biting my nails at the moustache disaster part! ;-)
Thanks for doing this xx
sugar and art - perfect combination! sugarmagic22@gmail.com
I know, it was awful… I imagine we’ve all experienced those times when everything seems to go wrong and you wonder how you’re gonna fix it and why the hell we do this to ourselves!! its funny when you look back on it but you feel like you’re gonna die at the time!! lol x
Thesugarcloudcakery
amazing, thanks for sharing x
https://www.facebook.com/pages/For-the-Love-of-Cake/539125856108107
Well done Fiona! Fabulous picture tutorial! Fantastic finished cake! I’m going to have to try a standing character cake! xx
Kath's Cakes https://www.facebook.com/pages/Kaths-Cakes/369485736483786
You should definitely give it a go… It’s not as scary as it looks when it’s all broken down xx
Thesugarcloudcakery

Brilliant tutorial xx detailed and inspiring x thank you so much xxxxx
karen,Gwynedd